Locations in Kindle have been a source of little confusion. Put simply, locations are virtual page numbers. Since the font size in Kindle can be changed, each size would create different sets of pages. A location on the other hand is a particular place in a book and is of fixed length. Thus in the event of a font change, a location will not change. Interestingly, non textual elements of a book such as cover have also locations. So when Kindle displays the first page of the book, the location does not start with 1.
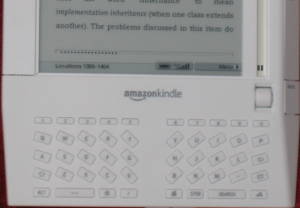
A location’s content is smaller than the Kindle screen and hence the bottom of the screen shows a range of locations that are being rendered. For example, the screen in the picture below is displaying content from locations 1399, 1400, 1401, 1402, 1403 and 1404.
To go to a specific location in the book, I simply go to Menu -> “Go to Location” and type in the location number. Also, I found that it is the only way to see how many locations your book has.
Another neat feature in Kindle is the ability to bookmark locations. To bookmark the currently displayed virtual page, simply move the wheel all the way to the top and select it. You will see that the top-right hand corner now shows a fold.
More on locations: Kindle Forum
JUnit 4 has some great features that makes unit testing way easier than before. Here are some tips for using JUnit 4:
- In JUnit 3.x the test methods must start with a “test” prefix. JUnit 4 uses @Test annotation for identifying test methods. All my new tests now have the same name as the method being tested which I find is more readable.
- JUnit 4 does not require the test class to extend TestCase class. Hence, to use assertXXX methods, you need to use the static methods available in Assert class. Java 5’s static import feature can make this usage very painless: import static org.junit.Assert.*;
- JUnit 3.x provides setup and teardown methods for creating/destroying fixtures. JUnit 4 offers @Before and @After annotations that provide same functionality (remember that methods annotated with @Before and @After will run for every test method)
- @BeforeClass and @AfterClass can only be used with static methods. These methods will run only once per class
- A test can be ignored using @Ignore annotation
- The expected attribute for @Test annotation can be used to verify exceptions thrown by a method (I remember using a Junit extension to achieve this behavior long time ago)

Its been a week since I got my Amazon Kindle and I am very impressed with it. I have lot of ebooks in PDF format and wanted a good ebook reader for a long time. I feel that Kindle does a good job of displaying PDF files but does not display images. I used Amazon’s free service to convert PDF files into Kindle format and the service has been pretty fast. I have also used MobiPocket creator for conversion and it worked great.
Pros:
- Great reader and does “disappear” while reading (and probabily why I love it the most)
- Annotation and bookmarking features are great
- Experimental browser allows internet surfing
- The e-ink technology is great and does not strain my eyes at all
Cons:
- Has some serious erganomic issues. I cannot count the number of times I accidently hit the “Next Page” button
- PDF conversion is not great (but that is really a PDF file format issue. I recently read that Adobe is planning to make PDF conversion easier with Acrobat 10. May be that will fix this issue)
- When searching/annotating, there is a noticable latency before the characters appear on the screen
- The book cover does not really hold Kindle very well. I am planning to use “velcro” as suggested by a reader on Amazon
I am yet to play with the audio functionality in the Kindle and waiting for its SDK to be made available.
Several months ago, I had to setup a JMS queue on a WebLogic 10 server. Bea has nice documentation for JMS at http://edocs.bea.com/wls/docs100/messaging.html. Here is a condensed version for setting up JMS Distributed Queues.
Disclaimer: These are instructions for the minimal JMS setup and do not include optimizations/tuning for production environment.
The first step in setting up a Distributed Queue is to create a JMS server for managing the Queue. Here are the steps for creating a JMS server.
-
Under Domain Structure, go to Services -> Messaging -> JMS Servers and hit New
-
Enter a name for the JMS server (e.g., “Blog JMS Server”) 
-
Hit “Create a new Store” (if you are not planning to persist messages, you don’t need a store). 
-
Select “File Store” as the type, and in the subsequent screen, provide a name and directory location for the store. Hit Finish
-
Hit “Next” and select the target WebLogic server. Hit “Finish” to complete the JMS server creation. Make sure you “Activate” the changes.
The next step is to create a JMS Module. A JMS Module is a way for packaging JMS resources such as Queues and topics. Here are the steps to create a JMS module:
-
Under Messaging, select JMS Module and hit “New”.
-
Enter a name (e.g., Blog JMS System Module) and the rest of the fields on the page can be left empty.
-
Hit “Next”, and select the WebLogic server you would like to target (ideally, this would be the same server that is hosting the JMS server you created above).
-
On the next screen hit Finish and “Activate” changes.
Now that the entire infrastructure is in place, it’s time to create a Distributed Queue. WebLogic’s new “Distributed Queue” eliminates the need to create physical queues and mapping them to a Distributed Queue (a great improvement from WL 8.x). Here are the steps:
-
Select the JMS Module you just created and hit “New” on the next page.
-
Select Distributed Queue option and continue on to the next page.
-
Provide a name (e.g., Blog JMS Queue) and a JNDI name (e.g., jndi.blogQueue). 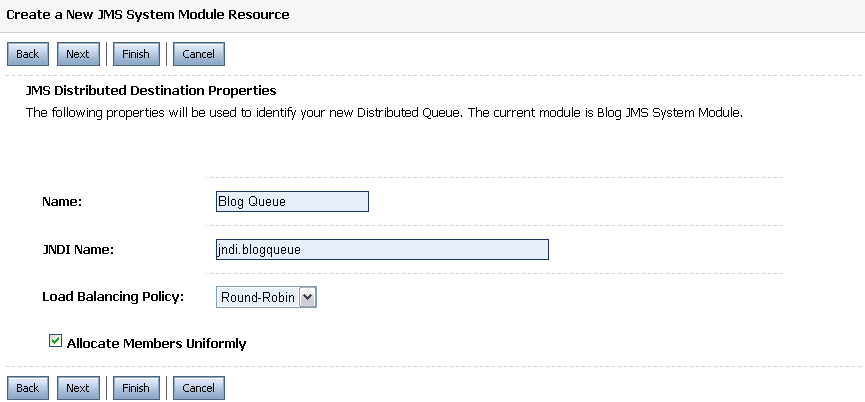
-
On the next page, select “Advance Targeting” and hit “Create a New Subdeployment”. A Subdeployment is a convenient way for grouping and targeting JMS module resources.
-
Provide a name (e.g., Blog Subdeployment) for the Subdeployment and hit “Ok”. 
-
Select the JMS server you created above as the target and hit “Finish”.
For clients to connect and use JMS resources, a JMS Connection Factory is needed. Here are the steps for creating a Connection factory:
-
Select the JMS Module created above and hit “New” on the next page.
-
Select “Connection Factory on the next screen and move on to the next page.
-
Give the Connection factory a name (e.g., Blog Connection Factory) and JNDI name (e.g., jndi.blogfactory). Hit “Next”. 
-
Select “Advance Targeting” and on the next page, select the Subdeployment you created above (Blog Subdeployment). Wait for the page to refresh itself and hit Finish


