Archive

Archive for May, 2012

Integrating CAPTCHA Into Spring MVC Web Applications

May 25th, 2012 3 comments

Integrating CAPTCHA in an application involves two simple steps:

  1. Display CAPTCHA Widget
  2. Validate CAPTCHA Reponse

In this blog post, I will be using Google’s reCAPTCHA. Before we can start using reCAPTCHA, we need to sign up for API keys.

Obtaining reCAPTCHA keys

1. Go to the reCAPTCHA Key Signup Page and login using your Google Account.

Enter the your domain name and hit “Create Key”. The generated keys by default are restricted to the specified domain. However, all keys will work on the localhost domain, making it easy to test during development.

Captcha Creation


Make a note of the generated public and private keys. We need both keys in order to generate CAPTCHA and verify response.

Display CAPTCHA Widget

reCAPTCHA provides a Java Library wrapper that makes CAPTCHA generation/verification easier. Maven users can get the jar file with the following dependency:

   <dependency>
		<groupId>net.tanesha.recaptcha4j</groupId>
		<artifactId>recaptcha4j</artifactId>
		<version>0.0.7</version>
	</dependency>

With the dependency added, generating the CAPTCHA Widget simply involves placing the below scriptlet in a JSP page:

	<%
		ReCaptcha captcha = ReCaptchaFactory.newReCaptcha("PUBLIC_KEY", "PRIVATE_KEY", false);
		out.print(captcha.createRecaptchaHtml(null, null));
    %>	

In the above code, we first create an instance of ReCaptcha by passing in the generated public and private key. The third parameter instructs if a noscript tag should to be placed around the generated HTML.

Since, I don’t like using Scriptlets in my JSP pages, I will create a reusable JSP tag that wraps the above code. We start out by creating a CaptchaTag class as shown below:


package com.inflinx.blog.web.tag;

import java.io.IOException;
import java.util.Properties;

import javax.servlet.jsp.JspException;
import javax.servlet.jsp.tagext.SimpleTagSupport;

import org.apache.commons.lang.StringUtils;

import net.tanesha.recaptcha.ReCaptcha;
import net.tanesha.recaptcha.ReCaptchaFactory;

public class CaptchaTag extends SimpleTagSupport
{
	private String publickey;
	private String privatekey;
	private String themeName;
	
	@Override
	public void doTag() throws JspException, IOException 
	{
		ReCaptcha captcha = ReCaptchaFactory.newReCaptcha(publickey, privatekey, false);
		Properties properties = new Properties();
		
		if(StringUtils.isNotEmpty(themeName))
		{
			properties.put("theme", themeName);
		}
		
		String captchaHtml = captcha.createRecaptchaHtml(null, properties);
		getJspContext().getOut().write(captchaHtml);
	}

	public String getThemeName() {
		return themeName;
	}

	public void setThemeName(String themeName) {
		this.themeName = themeName;
	}

	public String getPublickey() {
		return publickey;
	}

	public void setPublickey(String publickey) {
		this.publickey = publickey;
	}

	public String getPrivatekey() {
		return privatekey;
	}

	public void setPrivatekey(String privatekey) {
		this.privatekey = privatekey;
	}
}

The above tag takes has three attributes: public key, private key and theme name. The theme option can be used to control the reCAPTCHA widget’s look and feel. Possible values include: “red”, “white”, “blackglass” or “clean”. The default is the red.

To complete the implementation of the tag, lets create a captcha.tld file under WEB-INF/tlds folder with the following contents:

<taglib xsi:schemaLocation="http://java.sun.com/xml/ns/javaee/web-jsptaglibrary_2_1.xsd"
    xmlns="http://java.sun.com/xml/ns/javaee" xmlns:xsi="http://www.w3.org/2001/XMLSchema-instance" version="2.1">
     
    <tlibversion>1.0</tlibversion>
    <jspversion>2.1</jspversion>
    <shortname>CaptcahTags</shortname>
    <uri>http://blog.inflinx.com</uri>
    <info>Captcha Tags</info>
 
    <tag>
        <name>captcha</name>
        <tagclass>com.inflinx.blog.web.tag.CaptchaTag</tagclass>
        <bodycontent>empty</bodycontent>
        <info>Generates Captcha Widget</info>
        <attribute>
             <name>publickey</name>
             <required>true</required>
			 <rtexprvalue>true</rtexprvalue> 
        </attribute>
		<attribute>
             <name>privatekey</name>
             <required>true</required>
			 <rtexprvalue>true</rtexprvalue> 
        </attribute>
		<attribute>
             <name>themeName</name>
             <required>false</required>
			 <rtexprvalue>true</rtexprvalue> 
        </attribute>
    </tag>
 
</taglib>

With all this in place, update the JSP page with the following code to display the CAPTCHA Widget:


<%@ taglib uri="http://java.sun.com/jsp/jstl/core" prefix="c" %>
<%@ taglib uri="http://www.springframework.org/tags/form" prefix="form" %>
<%@ taglib prefix="captcha" uri="/WEB-INF/tlds/captcha.tld" %>
<%@ taglib prefix="spring" uri="http://www.springframework.org/tags" %>

<html>
<head>
	<title>Home</title>
</head>
<body>

<form method="post">

	<captcha:captcha themeName="clean" publickey="YOUR_PUBLIC_KEY" privatekey="YOUR_PRIVATE_KEY"/>
	
</form>


</body>
</html>

Upon running the code, you should see a CAPTCHA similar to the image below:

Captcha In Action

Validate CAPTCHA Reponse

In order to valdiate the CAPTCHA response, we need to modify the POST method of the receiving controller as shown below:

@RequestMapping(method = RequestMethod.POST)
	public String processSubmit(HttpServletRequest request, Model model)
	{
		ReCaptchaImpl reCaptcha = new ReCaptchaImpl();
        reCaptcha.setPrivateKey("YOUR_PRIVATE_KEY");
        
		String remoteAddr = request.getRemoteAddr();
        String challengeField = request.getParameter("recaptcha_challenge_field");
        String responseField = request.getParameter("recaptcha_response_field");
        ReCaptchaResponse reCaptchaResponse = reCaptcha.checkAnswer(remoteAddr, challengeField, responseField);

        if(!reCaptchaResponse.isValid())
        {
        	model.addAttribute("invalidCaptcha", "Captcha Is Invalid");
        	return "home";
        }
        
        return "success";
	}

In the above code, we start by creating a ReCaptchaImpl instance and pass in the Private key. The reCaptcha widget generates two fields “recaptcha_challenge_field”, “recaptcha_response_field” that are needed to verify the response. We pass in those two fields along with the IP Address of the client to get a response.

For invalid responses, we set a model attribute to indicate the error. Now, in a Spring MVC application where you are using a command object for the form, you can add an error instance instead:

		if(!reCaptchaResponse.isValid())
        {
        	errors.reject("captcha.invalid");
        }

Getting Started with Spring Web Flow – Part 1

May 18th, 2012 4 comments

Spring Web Flow is a sub project of Spring that can be used to model user interface activities as flows. For example, consider the scenario of looking up an employee using an Employee directory application. This activity involves entering the employee’s name, filtering through the search results and viewing the details of the employee. Spring Web Flow makes it easy to define and implement such activities as flows.

In this post, I will discuss the details involved in creating a simple web flow application. This post will serve as a foundation to a much complex application we will see in a later post.

Spring Web Flow is an extension to Spring MVC. So, we start out by creating a Spring MVC web application. I have used my Spring MVC Maven Archetype to generate a basic MVC web application named “helloflow”. Here is the structure of the generated project:

MVC Project Structure

The web-Context.xml file has the standard Spring MVC bean declarations:


<beans:beans xmlns="http://www.springframework.org/schema/mvc"
	xmlns:xsi="http://www.w3.org/2001/XMLSchema-instance"
	xmlns:beans="http://www.springframework.org/schema/beans"
	xmlns:context="http://www.springframework.org/schema/context"
	xsi:schemaLocation="http://www.springframework.org/schema/mvc http://www.springframework.org/schema/mvc/spring-mvc-3.0.xsd
		http://www.springframework.org/schema/beans http://www.springframework.org/schema/beans/spring-beans-3.0.xsd
		http://www.springframework.org/schema/context http://www.springframework.org/schema/context/spring-context-3.0.xsd">

	<!-- Enables the Spring MVC @Controller programming model -->
	<annotation-driven />

	<beans:bean class="org.springframework.web.servlet.view.InternalResourceViewResolver">
		<beans:property name="prefix" value="/WEB-INF/jsp/" />
		<beans:property name="suffix" value=".jsp" />
	</beans:bean>
	
	<context:component-scan base-package="com.inflinx.blog.helloflow.web" />
	
</beans:beans>

Similarly, the web.xml file contains the standard DispatcherServlet and ContextLoaderListener declarations:


<web-app version="2.5" xmlns="http://java.sun.com/xml/ns/javaee"
	xmlns:xsi="http://www.w3.org/2001/XMLSchema-instance"
	xsi:schemaLocation="http://java.sun.com/xml/ns/javaee http://java.sun.com/xml/ns/javaee/web-app_2_5.xsd">

	<context-param>
		<param-name>contextConfigLocation</param-name>
		<param-value>classpath:application-Context.xml</param-value>
	</context-param>
	
	<listener>
		<listener-class>org.springframework.web.context.ContextLoaderListener</listener-class>
	</listener>

	<servlet>
		<servlet-name>helloflow</servlet-name>
		<servlet-class>org.springframework.web.servlet.DispatcherServlet</servlet-class>
		<init-param>
			<param-name>contextConfigLocation</param-name>
			<param-value>/WEB-INF/web-Context.xml</param-value>
		</init-param>
		<load-on-startup>1</load-on-startup>
	</servlet>
		
	<servlet-mapping>
		<servlet-name>helloflow</servlet-name>
		<url-pattern>*.html</url-pattern>
	</servlet-mapping>

</web-app>

In order to add Spring Web Flow capabilities to the application, we need to add Web Flow jars to the project. This is done by simply adding the following Maven dependency to pom.xml:


<dependency>
	<groupId>org.springframework.webflow</groupId>
   	<artifactId>spring-webflow</artifactId>
    <version>2.3.1.RELEASE</version>
</dependency> 

We will be using XML to define flows. Before we start defining flows, we need to let the Spring MVC application know about web flow so that flow requests and flow execution can be handled properly. To keep things more modular, we will declare these web flow realted beans in a separate webflow-Context.xml file under WEB-INF folder. Here is the context file with web flow namespace declarations:


<beans xmlns="http://www.springframework.org/schema/beans"
	xmlns:xsi="http://www.w3.org/2001/XMLSchema-instance" 
	xmlns:flow="http://www.springframework.org/schema/webflow-config" 
	xmlns:context="http://www.springframework.org/schema/context"
	xsi:schemaLocation="http://www.springframework.org/schema/beans http://www.springframework.org/schema/beans/spring-beans-3.0.xsd 
	http://www.springframework.org/schema/context http://www.springframework.org/schema/context/spring-context-3.0.xsd
	http://www.springframework.org/schema/webflow-config http://www.springframework.org/schema/webflow-config/spring-webflow-config-2.3.xsd">

		
</beans>	

The first web flow bean that needs to be declared is the flow-registry bean:

	<flow:flow-registry flow-builder-services="flowBuilderServices" id="flowRegistry" base-path="/WEB-INF/flows/">
	<flow:flow-location id="hello" path="hello-flow.xml" /> 
</flow:flow-registry>	

The flow-registry bean serves as the registry of flow definitions. In the above declaration the base-path property tells that all the flows will be under “WEB-INF/flows”. The flow-location element indicates the existence of a “hello-flow” with the id “hello”. The id is important, as we will be using it to launch a flow later.

The flow-registry bean simply loads all the flows. The actual execution of the flow is performed by the flow-executor. The flow-executor bean declaration is shown below:

	<flow:flow-executor id="flowExecutor" flow-registry="flowRegistry" />

The next set of beans are the FlowHandlerAdapter and FlowHandlerMapping. The FlowHandlerAdapter bean is responsible for dispatching requests to flows where as the FlowHandlerMapping is responsible for mapping a request path to a specific flow.


<bean class="org.springframework.webflow.mvc.servlet.FlowHandlerAdapter">
	<property name="flowExecutor" ref="flowExecutor" />
</bean>

<bean class="org.springframework.webflow.mvc.servlet.FlowHandlerMapping">
	<property name="flowRegistry" ref="flowRegistry" />
	<property name="order" value="0" />
</bean>	

The final set of beans that needs to be declared are the MvcViewFactoryCreator and flow-builder-services. These beans are responsible resolving views. By default the MvcViewFactoryCreator will look for the views in the same folder as that of the flow definition.


<bean id="flowViewResolver" class="org.springframework.webflow.mvc.builder.MvcViewFactoryCreator">
	<property name="viewResolvers" ref="internalResourceViewResolver"/>
</bean>

<flow:flow-builder-services id="flowBuilderServices" view-factory-creator="flowViewResolver" />

This concludes the webflow-Context.xml definition. Here is complete context file declaration:


<beans xmlns="http://www.springframework.org/schema/beans"
	xmlns:xsi="http://www.w3.org/2001/XMLSchema-instance" 
	xmlns:flow="http://www.springframework.org/schema/webflow-config" 
	xmlns:context="http://www.springframework.org/schema/context"
	xsi:schemaLocation="http://www.springframework.org/schema/beans http://www.springframework.org/schema/beans/spring-beans-3.0.xsd 
	http://www.springframework.org/schema/context http://www.springframework.org/schema/context/spring-context-3.0.xsd
	http://www.springframework.org/schema/webflow-config http://www.springframework.org/schema/webflow-config/spring-webflow-config-2.3.xsd">

	
	<!-- Registry of executable flows -->
	<flow:flow-registry flow-builder-services="flowBuilderServices" id="flowRegistry" base-path="/WEB-INF/flows/">
		<flow:flow-location id="hello" path="hello-flow.xml" /> 
	</flow:flow-registry>
	
	<!-- Executes flows -->
	<flow:flow-executor id="flowExecutor" flow-registry="flowRegistry" />	
	
	<!-- Dispatches requests to Flows -->
	<bean class="org.springframework.webflow.mvc.servlet.FlowHandlerAdapter">
		<property name="flowExecutor" ref="flowExecutor" />
	</bean>
	
	<!-- Maps specific paths to flows. For example, /hello will look for a flow with id hello -->
	<bean class="org.springframework.webflow.mvc.servlet.FlowHandlerMapping">
		<property name="flowRegistry" ref="flowRegistry" />
		<property name="order" value="0" />
	</bean>
	
	<bean id="flowViewResolver" class="org.springframework.webflow.mvc.builder.MvcViewFactoryCreator" />

	<flow:flow-builder-services id="flowBuilderServices" view-factory-creator="flowViewResolver" />
	
</beans>

The next step is to define a flow. Each flow is made up of states where things tend to happen and transitions that takes the flow from one state to another. We will create a hello flow that has a single state. To do that, simply create a new hello-flow.xml file under WEB-INF/flows folder. Here are the contents of the file:


<flow xmlns="http://www.springframework.org/schema/webflow"
		xmlns:xsi="http://www.w3.org/2001/XMLSchema-instance"
		xsi:schemaLocation="http://www.springframework.org/schema/webflow http://www.springframework.org/schema/webflow/spring-webflow-2.0.xsd">
	
	<view-state id="hellowebflow" />
	
</flow>
	

As you notice, the above flow has only one state: a view state with id hellowebflow. View states displays user interface and invites the user to participate in the flow. So, when the above flow gets executed, Web Flow will look for a JSP page with the name hellowebflow.jsp under WEB-INF/flows and displays it. Here are the contents of the hellowebflow.jsp page:

<html>

	<head>
	
	</head>

	<body>
	
		<h2>Welcome to Webflow</h2>
	
	</body>

</html>

We are almost done with our application. We just need to make two more changes. The first change needs to be made in the web-Context.xml file to let Spring MVC know about the existence of webflow-Context.xml file. This is done by adding the following import element to web-Context.xml file:

<!-- Import the webflow definitions -->
<beans:import resource="webflow-Context.xml" />

Finally, we modify the web.xml file to instruct Spring to hanlde flow requests. This is done by adding a url-pattern element to the DispatcherServlet’s servlet-mapping element.


	<url-pattern>*.flow</url-pattern>
	

Once we have the application deployed, we can launch the flow using the URL: http::/helloflow/hello.flow
WebFlow App

Spring MVC 3.1.1 Archetype

May 18th, 2012 No comments

I have created a new Maven archetype for creating Spring MVC 3.1.1 based web applications.

To install the archetype, download the file and simply run the following command:

mvn install:install-file -DgroupId=com.inflinx.blog -DartifactId=spring-mvc-web-archetype -Dversion=1.0.0 -Dpackaging=jar -Dfile=spring-mvc-web-archetype-1.0.0.jar

The above command needs to be run from the directory where you have placed the downloaded file.

To use the installed archetype run the following command from your project folder:

mvn archetype:generate -DarchetypeGroupId=com.inflinx.blog -DarchetypeArtifactId=spring-mvc-web-archetype -DarchetypeVersion=1.0.0 -DgroupId=com.inflinx.blog -DartifactId=YOUR_PROJECT_NAME -DartifactVersion=1.0.0 -DinteractiveMode=false

If you are interested in creating your own archetypes refer to my Creating Maven Archetypes – Spring MVC Example blog post.

Categories: Maven, Spring Tags: ,

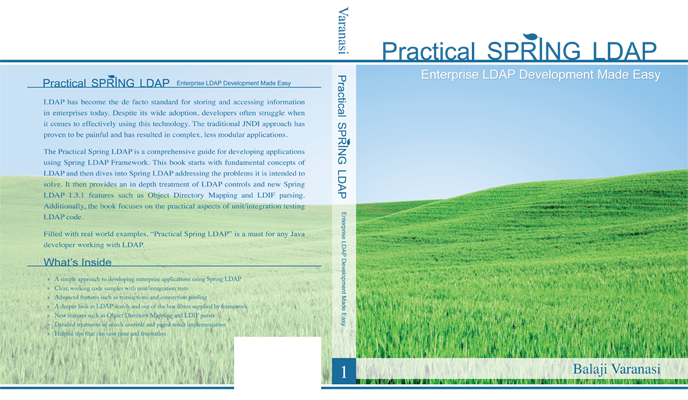
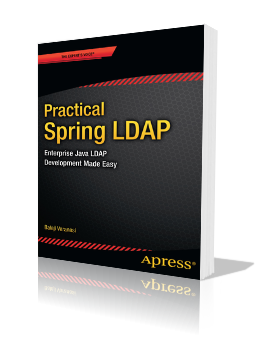
My Book – Practical Spring LDAP

May 17th, 2012 1 comment

I am excited to share that my “Practical Spring LDAP” book is now available on Amazon.

This is the only book the provides a complete coverage of Spring LDAP Framework. More details are available at the book’s website.

Categories: Ldap, Spring Tags: ,

JSON/XML/RSS Rest Endpoints using Spring 3.1

May 13th, 2012 1 comment

Spring 3.0 introduced support for REST and this has got even better with Spring 3.1. In this post, I will use Spring 3.1 to create REST endpoints that will serve book information in JSON, XML and RSS formats.

To get started, add the following dependencies to your Spring based web application:

jackson-all-1.9.7.jar for generating JSON output
rome-1.0.jar for generating RSS/Atom feeds
JDOM 1.0 Jar a ROME project dependency

Maven users can get these jars by adding the following dependencies to their pom.xml:

		<dependency>
			<groupId>org.codehaus.jackson</groupId>
			<artifactId>jackson-jaxrs</artifactId>
			<version>1.9.7</version>
		</dependency>
		<dependency>
			<groupId>rome</groupId>
			<artifactId>rome</artifactId>
			<version>1.0</version>
		</dependency>
	

Spring’s REST support is built on top of Spring MVC. So, we start out by creating a Spring MVC web controller as shown below:

package com.inflinx.blog.web.controller;

import org.springframework.stereotype.Controller;
import org.springframework.ui.Model;
import org.springframework.web.bind.annotation.RequestMapping;
import org.springframework.web.bind.annotation.RequestMethod;

import com.inflinx.blog.domain.Book;

@RequestMapping("/book")
@Controller
public class BookController {
	
	@RequestMapping(method = RequestMethod.GET)
	public String showBook(Model model) 
	{
		model.addAttribute("book", new Book("Practical Spring LDAP", "978-1475265453", "Balaji Varanasi"));
		
		return "book";
	}
	
}

In the above controller, we used the “/book” path with out the usual .html extension. This allows the controller to serve additional media type requests such as JSON and XML. On a GET request,
the showBook method gets invoked. The method’s implementation simply adds the book data to the model.

The Book class implementation is given below. Since we will be using the standard JAXB for creating XML versions of the data, the Book class is annotated with the @XMLRootElement JAXB annotation.

package com.inflinx.blog.domain;

import javax.xml.bind.annotation.XmlRootElement;

@XmlRootElement(name="book")
public class Book 
{
	private String name;
	private String isbn;
	private String author;
	
	public Book()
	{
		
	}
	
	public Book(String name, String isbn, String author)
	{
		this.name = name;
		this.isbn = isbn;
		this.author = author;
	}
	
	public String getName() {
		return name;
	}
	public void setName(String name) {
		this.name = name;
	}
	public String getIsbn() {
		return isbn;
	}
	public void setIsbn(String isbn) {
		this.isbn = isbn;
	}
	public String getAuthor() {
		return author;
	}
	public void setAuthor(String author) {
		this.author = author;
	}
}

The “book” view returned by the showCatalog method is implemented using the following book JSP page:

<%@ taglib uri="http://java.sun.com/jsp/jstl/core" prefix="c" %>
<%@ page session="false" %>
<html>
	<head>
		<title>Home</title>
	</head>
	<body>
		
		${book.name} (${book.isbn}) - ${book.author} 

	</body>
</html>

Finally, the Spring’s web context configuration is shown below:

<beans:beans xmlns="http://www.springframework.org/schema/mvc"
	xmlns:xsi="http://www.w3.org/2001/XMLSchema-instance"
	xmlns:beans="http://www.springframework.org/schema/beans"
	xmlns:context="http://www.springframework.org/schema/context"
	xsi:schemaLocation="http://www.springframework.org/schema/mvc http://www.springframework.org/schema/mvc/spring-mvc-3.0.xsd
		http://www.springframework.org/schema/beans http://www.springframework.org/schema/beans/spring-beans-3.0.xsd
		http://www.springframework.org/schema/context http://www.springframework.org/schema/context/spring-context-3.0.xsd">

	<!-- Enables the Spring MVC @Controller programming model -->
	<annotation-driven />

	<!-- Resolves views selected for rendering by @Controllers to .jsp resources in the /WEB-INF/views directory -->
	<beans:bean class="org.springframework.web.servlet.view.InternalResourceViewResolver">
		<beans:property name="prefix" value="/WEB-INF/views/" />
		<beans:property name="suffix" value=".jsp" />
	</beans:bean>
	
	<context:component-scan base-package="com.inflinx.blog.web.controller" />
	
</beans:beans>

Up to this point, we have simply created a standard Spring MVC based web application with one controller. When we invoke the controller using the web browser, the following view gets rendered:

Now, converting this controller to serve JSON/XML/RSS variations simply involves configuring a ContentNegotiatingViewResolver. The needed configuration is showing below:


<beans:bean class="org.springframework.web.servlet.view.ContentNegotiatingViewResolver">
		<beans:property name="order" value="1" />
		<beans:property name="mediaTypes">
			<beans:map>
				<beans:entry key="json" value="application/json"/>
				<beans:entry key="xml" value="application/xml"/>
				<beans:entry key="rss" value="application/rss+xml"/>
			</beans:map>
		</beans:property>
		<beans:property name="defaultViews">  
    		<beans:list>  
    			<!-- Renders JSON View -->
      			<beans:bean class="org.springframework.web.servlet.view.json.MappingJacksonJsonView" />  
      			
      			<!-- Renders XML View -->
      			<beans:bean class="org.springframework.web.servlet.view.xml.MarshallingView">
					<beans:constructor-arg>
						<beans:bean class="org.springframework.oxm.jaxb.Jaxb2Marshaller">
							<beans:property name="classesToBeBound">
								<beans:list>
									<beans:value>com.inflinx.blog.domain.Book</beans:value>
								</beans:list>
							</beans:property>
						</beans:bean>
					</beans:constructor-arg>
				</beans:bean>
				
				 <!-- Renders RSS View -->
				<beans:bean class="com.inflinx.blog.web.view.BookRssView" />
    		</beans:list>  
  		</beans:property>		
	</beans:bean>

The ContentNegotiatingViewResolver is a specialized implementation that resolves a view based on the request file extension or Accept header.
In the above configuration we have set the order property to 1 indicating that it must be positioned first in the chain. Using the mediaTypes property, we have provided the mapping from file extension to media types.
Finally, we have used the defaultViews to indicate the classes that needs to be used for creating the view. Upon receiving a request the above view resolver will use the file extension to determine the appropriate view
and delegates the view creation to it.

Out of the box, Spring does not provide an RSS view. So, we need to implement an RSS view specific to the domain object or project. Here is the BookRssView implementation:


package com.inflinx.blog.web.view;

import java.util.ArrayList;
import java.util.List;
import java.util.Map;

import javax.servlet.http.HttpServletRequest;
import javax.servlet.http.HttpServletResponse;

import org.springframework.web.servlet.view.feed.AbstractRssFeedView;

import com.inflinx.blog.domain.Book;
import com.sun.syndication.feed.rss.Channel;
import com.sun.syndication.feed.rss.Item;

public class BookRssView  extends AbstractRssFeedView
{
	@Override
	protected void buildFeedMetadata(Map model, Channel feed,
			HttpServletRequest request) {
		
		feed.setTitle("Book Data");
		feed.setDescription("This is an awesome feed about my book.");
		feed.setLink("blog.inflinx.com");
		
	}
	
	@Override
	protected List buildFeedItems(Map model, HttpServletRequest request, 
				HttpServletResponse response) throws Exception {
		
		// Get the book from the model
		Book book = (Book)model.get("book");
		
		// Create feed items
		List items = new ArrayList();
		Item item = new Item();
		item.setAuthor(book.getAuthor());
		item.setTitle(book.getName());
		item.setLink("http://inflinx.com/ldap");
		items.add(item);
		
		return items;
	}

}


The BookRssView extends Spring’s AbstractRssFeedView. In the buildFeedMetadata we create RSS metadata such as title, link and description. In the buildFeedItems we create the items that needs to be part of the RSS feed.

Now, when we hit the controller with a json extension we will get the JSON output as shown below:

JSON View

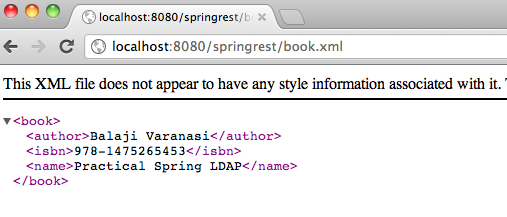
Similarly, the XML view is shown below:
XML View

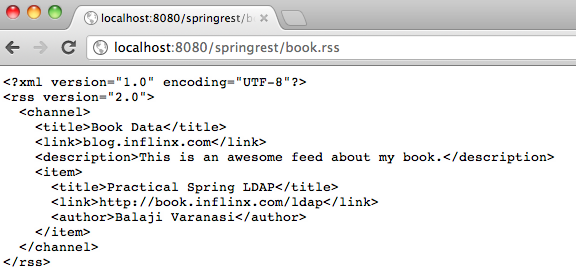
Finally, the RSS view is below:
RSS View

Categories: Rest Tags: , , ,

Using Jackson for Java/JSON Conversion

May 10th, 2012 No comments

Jackson is one of the popular Java libraries that makes dealing with JSON easier. In this post, I will share techniques for converting JSON to Java and vice-versa.

The first thing we need to do is download the Jackson jar.

Maven users can simply include this dependency:

	<dependency>
		<groupId>org.codehaus.jackson</groupId>
  		<artifactId>jackson-jaxrs</artifactId>
  		<version>1.9.7</version>
	</dependency>

Converting Java objects to JSON

Consider a person object with fields first name, last name and ssn. The Java representation of the person is given below:

public class Person {
	
	private String firstName;
	private String lastName;
	private String ssn;
	
	public Person() {
		
	}
	 
	public Person(String firstName, String lastName, String ssn) {
		this.firstName = firstName;
		this.lastName = lastName;
		this.ssn = ssn;
	}
	
	public String getFirstName() {
		return firstName;
	}
	public void setFirstName(String firstName) {
		this.firstName = firstName;
	}
	public String getLastName() {
		return lastName;
	}
	public void setLastName(String lastName) {
		this.lastName = lastName;
	}
	public String getSsn() {
		return ssn;
	}
	public void setSsn(String ssn) {
		this.ssn = ssn;
	}
	
}

Converting a concrete instance of Person class using Jackson involves creating a new ObjectMapper and invoking the writeValueAsString method. The ObjectMapper instance is threadsafe and can be used across multiple threads. The code is shown below:

	public void convertJavaToJson()
	{
		ObjectMapper objectMapper = new ObjectMapper();
		
		Person person = new Person("John", "Doe", "123-45-6789");
		
		try
		{
			String json = objectMapper.writeValueAsString(person);
			System.out.println(json);
		}
		catch(Exception e)
		{
			e.printStackTrace();
		}
	}

Upon running the method, the following output is produced:

{“firstName”:”John”,”lastName”:”Doe”,”ssn”:”123-45-6789″}

Jackson automatically converts any nested objects to JSON. For example, lets say each person has an instance of Address class shown below:

public class Address {
	
	private String address1;
	private String city;
	
	public String getAddress1() {
		return address1;
	}
	public void setAddress1(String address1) {
		this.address1 = address1;
	}
	public String getCity() {
		return city;
	}
	public void setCity(String city) {
		this.city = city;
	}
}

The covertJavaToJson method below is converted to add an address and produce JSON:

public void convertJavaToJson()
	{
		ObjectMapper objectMapper = new ObjectMapper();
		
		Person person = new Person("John", "Doe", "123-45-6789");
		
		Address address = new Address();
		address.setAddress1("Main Street");
		address.setCity("Salt Lake City");
		person.setAddress(address);
		
		
		try
		{
			String json = objectMapper.writeValueAsString(person);
			System.out.println(json);
		}
		catch(Exception e)
		{
			e.printStackTrace();
		}
	}

Here is the resulting JSON:

{“firstName”:”John”,”lastName”:”Doe”,”ssn”:”123-45-6789″,”address”:{“address1″:”Main Street”,”city”:”Salt Lake City”}}

It is possible to customize the JSON produced by Jackson. Let’s say we would like to modify the attribute names in the generated JSON to fName and lName. This can be done by simply annotating the Person’s fields with @@JsonProperty. Here is the modified class:

public class Person {
	
	@JsonProperty("fName")
	private String firstName;
	
	@JsonProperty("lName")
	private String lastName;
	//Other properties and getters/setters	
}

Here is the generated JSON with new attribute names.

{“ssn”:”123-45-6789″,”address”:{“address1″:”Main Street”,”city”:”Salt Lake City”},”fName”:”John”,”lName”:”Doe”}

It is also possible to filter certain fields from being part of the produced JSON. This is done by annotating the field with @JsonIgnore annotation. In the code we below, we placed the annotation on the Address field:

public class Person {
	
	@JsonProperty("fName")
	private String firstName;
	
	@JsonProperty("lName")
	private String lastName;
	private String ssn;
	
	@JsonIgnore
	private Address address;
	
	// Getters and setters
}

Now, when we run the conversion, address will not be included:

{“ssn”:”123-45-6789″,”fName”:”John”,”lName”:”Doe”}

Converting JSON to Java Objects

Let’s say we want to convert the following JSON representation of a person to Person object.

{“firstName”:”Jane”,”lastName”:”Doe”,”ssn”:”456-78-9012″}

In order to perform the conversion, we create an instance of ObjectMapper and invoke the readValue method on it as shown below:

public void convertJSONtoJava()
	{
		String personJson = "{\"firstName\":\"Jane\",\"lastName\":\"Doe\",\"ssn\":\"456-78-9012\"}";
		
		ObjectMapper objectMapper = new ObjectMapper();
		try
		{
			Person person = objectMapper.readValue(personJson, Person.class);
			System.out.println(person);
		}
		catch(Exception e)
		{
			e.printStackTrace();
		}
	}

Often times, the Java controllers or Servlets recieve JSON from clients with additional information. For example, the JSON below has an additional action parameter:

{“action”:”modify”,”firstName”:”Jane”,”lastName”:”Doe”,”ssn”:”456-78-9012″}

In those cases, mapping JSON to a Java object will result in UnrecognizedPropertyException:

org.codehaus.jackson.map.exc.UnrecognizedPropertyException: Unrecognized field “action” (Class Person), not marked as ignorable
at [Source: java.io.StringReader@16bdb503; line: 1, column: 12] (through reference chain: Person[“action”])
at org.codehaus.jackson.map.exc.UnrecognizedPropertyException.from(UnrecognizedPropertyException.java:53)
at org.codehaus.jackson.map.deser.StdDeserializationContext.unknownFieldException(StdDeserializationContext.java:267)

These situations can be easily addressed by annotating the Person class with @JsonIgnoreProperties annotation. Here is modified class:

@JsonIgnoreProperties(ignoreUnknown=true)
public class Person {
	// Fields and getters/setters
}