Archive

Author Archive

Getting Started with Spring Web Flow – Part 1

May 18th, 2012 4 comments

Spring Web Flow is a sub project of Spring that can be used to model user interface activities as flows. For example, consider the scenario of looking up an employee using an Employee directory application. This activity involves entering the employee’s name, filtering through the search results and viewing the details of the employee. Spring Web Flow makes it easy to define and implement such activities as flows.

In this post, I will discuss the details involved in creating a simple web flow application. This post will serve as a foundation to a much complex application we will see in a later post.

Spring Web Flow is an extension to Spring MVC. So, we start out by creating a Spring MVC web application. I have used my Spring MVC Maven Archetype to generate a basic MVC web application named “helloflow”. Here is the structure of the generated project:

MVC Project Structure

The web-Context.xml file has the standard Spring MVC bean declarations:


<beans:beans xmlns="http://www.springframework.org/schema/mvc"
	xmlns:xsi="http://www.w3.org/2001/XMLSchema-instance"
	xmlns:beans="http://www.springframework.org/schema/beans"
	xmlns:context="http://www.springframework.org/schema/context"
	xsi:schemaLocation="http://www.springframework.org/schema/mvc http://www.springframework.org/schema/mvc/spring-mvc-3.0.xsd
		http://www.springframework.org/schema/beans http://www.springframework.org/schema/beans/spring-beans-3.0.xsd
		http://www.springframework.org/schema/context http://www.springframework.org/schema/context/spring-context-3.0.xsd">

	<!-- Enables the Spring MVC @Controller programming model -->
	<annotation-driven />

	<beans:bean class="org.springframework.web.servlet.view.InternalResourceViewResolver">
		<beans:property name="prefix" value="/WEB-INF/jsp/" />
		<beans:property name="suffix" value=".jsp" />
	</beans:bean>
	
	<context:component-scan base-package="com.inflinx.blog.helloflow.web" />
	
</beans:beans>

Similarly, the web.xml file contains the standard DispatcherServlet and ContextLoaderListener declarations:


<web-app version="2.5" xmlns="http://java.sun.com/xml/ns/javaee"
	xmlns:xsi="http://www.w3.org/2001/XMLSchema-instance"
	xsi:schemaLocation="http://java.sun.com/xml/ns/javaee http://java.sun.com/xml/ns/javaee/web-app_2_5.xsd">

	<context-param>
		<param-name>contextConfigLocation</param-name>
		<param-value>classpath:application-Context.xml</param-value>
	</context-param>
	
	<listener>
		<listener-class>org.springframework.web.context.ContextLoaderListener</listener-class>
	</listener>

	<servlet>
		<servlet-name>helloflow</servlet-name>
		<servlet-class>org.springframework.web.servlet.DispatcherServlet</servlet-class>
		<init-param>
			<param-name>contextConfigLocation</param-name>
			<param-value>/WEB-INF/web-Context.xml</param-value>
		</init-param>
		<load-on-startup>1</load-on-startup>
	</servlet>
		
	<servlet-mapping>
		<servlet-name>helloflow</servlet-name>
		<url-pattern>*.html</url-pattern>
	</servlet-mapping>

</web-app>

In order to add Spring Web Flow capabilities to the application, we need to add Web Flow jars to the project. This is done by simply adding the following Maven dependency to pom.xml:


<dependency>
	<groupId>org.springframework.webflow</groupId>
   	<artifactId>spring-webflow</artifactId>
    <version>2.3.1.RELEASE</version>
</dependency> 

We will be using XML to define flows. Before we start defining flows, we need to let the Spring MVC application know about web flow so that flow requests and flow execution can be handled properly. To keep things more modular, we will declare these web flow realted beans in a separate webflow-Context.xml file under WEB-INF folder. Here is the context file with web flow namespace declarations:


<beans xmlns="http://www.springframework.org/schema/beans"
	xmlns:xsi="http://www.w3.org/2001/XMLSchema-instance" 
	xmlns:flow="http://www.springframework.org/schema/webflow-config" 
	xmlns:context="http://www.springframework.org/schema/context"
	xsi:schemaLocation="http://www.springframework.org/schema/beans http://www.springframework.org/schema/beans/spring-beans-3.0.xsd 
	http://www.springframework.org/schema/context http://www.springframework.org/schema/context/spring-context-3.0.xsd
	http://www.springframework.org/schema/webflow-config http://www.springframework.org/schema/webflow-config/spring-webflow-config-2.3.xsd">

		
</beans>	

The first web flow bean that needs to be declared is the flow-registry bean:

	<flow:flow-registry flow-builder-services="flowBuilderServices" id="flowRegistry" base-path="/WEB-INF/flows/">
	<flow:flow-location id="hello" path="hello-flow.xml" /> 
</flow:flow-registry>	

The flow-registry bean serves as the registry of flow definitions. In the above declaration the base-path property tells that all the flows will be under “WEB-INF/flows”. The flow-location element indicates the existence of a “hello-flow” with the id “hello”. The id is important, as we will be using it to launch a flow later.

The flow-registry bean simply loads all the flows. The actual execution of the flow is performed by the flow-executor. The flow-executor bean declaration is shown below:

	<flow:flow-executor id="flowExecutor" flow-registry="flowRegistry" />

The next set of beans are the FlowHandlerAdapter and FlowHandlerMapping. The FlowHandlerAdapter bean is responsible for dispatching requests to flows where as the FlowHandlerMapping is responsible for mapping a request path to a specific flow.


<bean class="org.springframework.webflow.mvc.servlet.FlowHandlerAdapter">
	<property name="flowExecutor" ref="flowExecutor" />
</bean>

<bean class="org.springframework.webflow.mvc.servlet.FlowHandlerMapping">
	<property name="flowRegistry" ref="flowRegistry" />
	<property name="order" value="0" />
</bean>	

The final set of beans that needs to be declared are the MvcViewFactoryCreator and flow-builder-services. These beans are responsible resolving views. By default the MvcViewFactoryCreator will look for the views in the same folder as that of the flow definition.


<bean id="flowViewResolver" class="org.springframework.webflow.mvc.builder.MvcViewFactoryCreator">
	<property name="viewResolvers" ref="internalResourceViewResolver"/>
</bean>

<flow:flow-builder-services id="flowBuilderServices" view-factory-creator="flowViewResolver" />

This concludes the webflow-Context.xml definition. Here is complete context file declaration:


<beans xmlns="http://www.springframework.org/schema/beans"
	xmlns:xsi="http://www.w3.org/2001/XMLSchema-instance" 
	xmlns:flow="http://www.springframework.org/schema/webflow-config" 
	xmlns:context="http://www.springframework.org/schema/context"
	xsi:schemaLocation="http://www.springframework.org/schema/beans http://www.springframework.org/schema/beans/spring-beans-3.0.xsd 
	http://www.springframework.org/schema/context http://www.springframework.org/schema/context/spring-context-3.0.xsd
	http://www.springframework.org/schema/webflow-config http://www.springframework.org/schema/webflow-config/spring-webflow-config-2.3.xsd">

	
	<!-- Registry of executable flows -->
	<flow:flow-registry flow-builder-services="flowBuilderServices" id="flowRegistry" base-path="/WEB-INF/flows/">
		<flow:flow-location id="hello" path="hello-flow.xml" /> 
	</flow:flow-registry>
	
	<!-- Executes flows -->
	<flow:flow-executor id="flowExecutor" flow-registry="flowRegistry" />	
	
	<!-- Dispatches requests to Flows -->
	<bean class="org.springframework.webflow.mvc.servlet.FlowHandlerAdapter">
		<property name="flowExecutor" ref="flowExecutor" />
	</bean>
	
	<!-- Maps specific paths to flows. For example, /hello will look for a flow with id hello -->
	<bean class="org.springframework.webflow.mvc.servlet.FlowHandlerMapping">
		<property name="flowRegistry" ref="flowRegistry" />
		<property name="order" value="0" />
	</bean>
	
	<bean id="flowViewResolver" class="org.springframework.webflow.mvc.builder.MvcViewFactoryCreator" />

	<flow:flow-builder-services id="flowBuilderServices" view-factory-creator="flowViewResolver" />
	
</beans>

The next step is to define a flow. Each flow is made up of states where things tend to happen and transitions that takes the flow from one state to another. We will create a hello flow that has a single state. To do that, simply create a new hello-flow.xml file under WEB-INF/flows folder. Here are the contents of the file:


<flow xmlns="http://www.springframework.org/schema/webflow"
		xmlns:xsi="http://www.w3.org/2001/XMLSchema-instance"
		xsi:schemaLocation="http://www.springframework.org/schema/webflow http://www.springframework.org/schema/webflow/spring-webflow-2.0.xsd">
	
	<view-state id="hellowebflow" />
	
</flow>
	

As you notice, the above flow has only one state: a view state with id hellowebflow. View states displays user interface and invites the user to participate in the flow. So, when the above flow gets executed, Web Flow will look for a JSP page with the name hellowebflow.jsp under WEB-INF/flows and displays it. Here are the contents of the hellowebflow.jsp page:

<html>

	<head>
	
	</head>

	<body>
	
		<h2>Welcome to Webflow</h2>
	
	</body>

</html>

We are almost done with our application. We just need to make two more changes. The first change needs to be made in the web-Context.xml file to let Spring MVC know about the existence of webflow-Context.xml file. This is done by adding the following import element to web-Context.xml file:

<!-- Import the webflow definitions -->
<beans:import resource="webflow-Context.xml" />

Finally, we modify the web.xml file to instruct Spring to hanlde flow requests. This is done by adding a url-pattern element to the DispatcherServlet’s servlet-mapping element.


	<url-pattern>*.flow</url-pattern>
	

Once we have the application deployed, we can launch the flow using the URL: http::/helloflow/hello.flow
WebFlow App

Spring MVC 3.1.1 Archetype

May 18th, 2012 No comments

I have created a new Maven archetype for creating Spring MVC 3.1.1 based web applications.

To install the archetype, download the file and simply run the following command:

mvn install:install-file -DgroupId=com.inflinx.blog -DartifactId=spring-mvc-web-archetype -Dversion=1.0.0 -Dpackaging=jar -Dfile=spring-mvc-web-archetype-1.0.0.jar

The above command needs to be run from the directory where you have placed the downloaded file.

To use the installed archetype run the following command from your project folder:

mvn archetype:generate -DarchetypeGroupId=com.inflinx.blog -DarchetypeArtifactId=spring-mvc-web-archetype -DarchetypeVersion=1.0.0 -DgroupId=com.inflinx.blog -DartifactId=YOUR_PROJECT_NAME -DartifactVersion=1.0.0 -DinteractiveMode=false

If you are interested in creating your own archetypes refer to my Creating Maven Archetypes – Spring MVC Example blog post.

Categories: Maven, Spring Tags: ,

My Book – Practical Spring LDAP

May 17th, 2012 1 comment

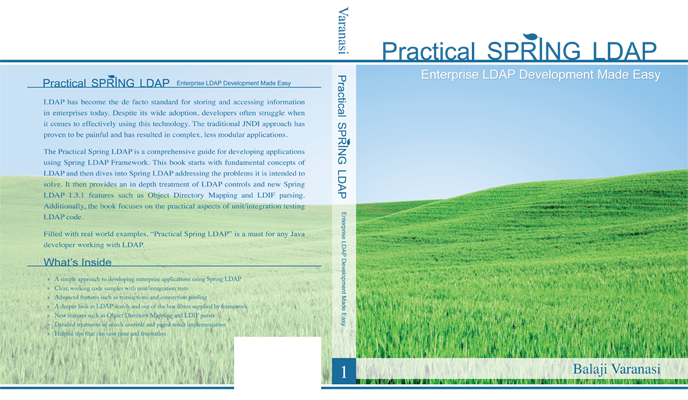
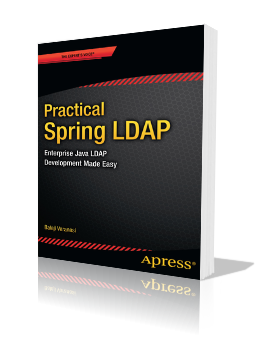
I am excited to share that my “Practical Spring LDAP” book is now available on Amazon.

This is the only book the provides a complete coverage of Spring LDAP Framework. More details are available at the book’s website.

Categories: Ldap, Spring Tags: ,

JSON/XML/RSS Rest Endpoints using Spring 3.1

May 13th, 2012 1 comment

Spring 3.0 introduced support for REST and this has got even better with Spring 3.1. In this post, I will use Spring 3.1 to create REST endpoints that will serve book information in JSON, XML and RSS formats.

To get started, add the following dependencies to your Spring based web application:

jackson-all-1.9.7.jar for generating JSON output
rome-1.0.jar for generating RSS/Atom feeds
JDOM 1.0 Jar a ROME project dependency

Maven users can get these jars by adding the following dependencies to their pom.xml:

		<dependency>
			<groupId>org.codehaus.jackson</groupId>
			<artifactId>jackson-jaxrs</artifactId>
			<version>1.9.7</version>
		</dependency>
		<dependency>
			<groupId>rome</groupId>
			<artifactId>rome</artifactId>
			<version>1.0</version>
		</dependency>
	

Spring’s REST support is built on top of Spring MVC. So, we start out by creating a Spring MVC web controller as shown below:

package com.inflinx.blog.web.controller;

import org.springframework.stereotype.Controller;
import org.springframework.ui.Model;
import org.springframework.web.bind.annotation.RequestMapping;
import org.springframework.web.bind.annotation.RequestMethod;

import com.inflinx.blog.domain.Book;

@RequestMapping("/book")
@Controller
public class BookController {
	
	@RequestMapping(method = RequestMethod.GET)
	public String showBook(Model model) 
	{
		model.addAttribute("book", new Book("Practical Spring LDAP", "978-1475265453", "Balaji Varanasi"));
		
		return "book";
	}
	
}

In the above controller, we used the “/book” path with out the usual .html extension. This allows the controller to serve additional media type requests such as JSON and XML. On a GET request,
the showBook method gets invoked. The method’s implementation simply adds the book data to the model.

The Book class implementation is given below. Since we will be using the standard JAXB for creating XML versions of the data, the Book class is annotated with the @XMLRootElement JAXB annotation.

package com.inflinx.blog.domain;

import javax.xml.bind.annotation.XmlRootElement;

@XmlRootElement(name="book")
public class Book 
{
	private String name;
	private String isbn;
	private String author;
	
	public Book()
	{
		
	}
	
	public Book(String name, String isbn, String author)
	{
		this.name = name;
		this.isbn = isbn;
		this.author = author;
	}
	
	public String getName() {
		return name;
	}
	public void setName(String name) {
		this.name = name;
	}
	public String getIsbn() {
		return isbn;
	}
	public void setIsbn(String isbn) {
		this.isbn = isbn;
	}
	public String getAuthor() {
		return author;
	}
	public void setAuthor(String author) {
		this.author = author;
	}
}

The “book” view returned by the showCatalog method is implemented using the following book JSP page:

<%@ taglib uri="http://java.sun.com/jsp/jstl/core" prefix="c" %>
<%@ page session="false" %>
<html>
	<head>
		<title>Home</title>
	</head>
	<body>
		
		${book.name} (${book.isbn}) - ${book.author} 

	</body>
</html>

Finally, the Spring’s web context configuration is shown below:

<beans:beans xmlns="http://www.springframework.org/schema/mvc"
	xmlns:xsi="http://www.w3.org/2001/XMLSchema-instance"
	xmlns:beans="http://www.springframework.org/schema/beans"
	xmlns:context="http://www.springframework.org/schema/context"
	xsi:schemaLocation="http://www.springframework.org/schema/mvc http://www.springframework.org/schema/mvc/spring-mvc-3.0.xsd
		http://www.springframework.org/schema/beans http://www.springframework.org/schema/beans/spring-beans-3.0.xsd
		http://www.springframework.org/schema/context http://www.springframework.org/schema/context/spring-context-3.0.xsd">

	<!-- Enables the Spring MVC @Controller programming model -->
	<annotation-driven />

	<!-- Resolves views selected for rendering by @Controllers to .jsp resources in the /WEB-INF/views directory -->
	<beans:bean class="org.springframework.web.servlet.view.InternalResourceViewResolver">
		<beans:property name="prefix" value="/WEB-INF/views/" />
		<beans:property name="suffix" value=".jsp" />
	</beans:bean>
	
	<context:component-scan base-package="com.inflinx.blog.web.controller" />
	
</beans:beans>

Up to this point, we have simply created a standard Spring MVC based web application with one controller. When we invoke the controller using the web browser, the following view gets rendered:

Now, converting this controller to serve JSON/XML/RSS variations simply involves configuring a ContentNegotiatingViewResolver. The needed configuration is showing below:


<beans:bean class="org.springframework.web.servlet.view.ContentNegotiatingViewResolver">
		<beans:property name="order" value="1" />
		<beans:property name="mediaTypes">
			<beans:map>
				<beans:entry key="json" value="application/json"/>
				<beans:entry key="xml" value="application/xml"/>
				<beans:entry key="rss" value="application/rss+xml"/>
			</beans:map>
		</beans:property>
		<beans:property name="defaultViews">  
    		<beans:list>  
    			<!-- Renders JSON View -->
      			<beans:bean class="org.springframework.web.servlet.view.json.MappingJacksonJsonView" />  
      			
      			<!-- Renders XML View -->
      			<beans:bean class="org.springframework.web.servlet.view.xml.MarshallingView">
					<beans:constructor-arg>
						<beans:bean class="org.springframework.oxm.jaxb.Jaxb2Marshaller">
							<beans:property name="classesToBeBound">
								<beans:list>
									<beans:value>com.inflinx.blog.domain.Book</beans:value>
								</beans:list>
							</beans:property>
						</beans:bean>
					</beans:constructor-arg>
				</beans:bean>
				
				 <!-- Renders RSS View -->
				<beans:bean class="com.inflinx.blog.web.view.BookRssView" />
    		</beans:list>  
  		</beans:property>		
	</beans:bean>

The ContentNegotiatingViewResolver is a specialized implementation that resolves a view based on the request file extension or Accept header.
In the above configuration we have set the order property to 1 indicating that it must be positioned first in the chain. Using the mediaTypes property, we have provided the mapping from file extension to media types.
Finally, we have used the defaultViews to indicate the classes that needs to be used for creating the view. Upon receiving a request the above view resolver will use the file extension to determine the appropriate view
and delegates the view creation to it.

Out of the box, Spring does not provide an RSS view. So, we need to implement an RSS view specific to the domain object or project. Here is the BookRssView implementation:


package com.inflinx.blog.web.view;

import java.util.ArrayList;
import java.util.List;
import java.util.Map;

import javax.servlet.http.HttpServletRequest;
import javax.servlet.http.HttpServletResponse;

import org.springframework.web.servlet.view.feed.AbstractRssFeedView;

import com.inflinx.blog.domain.Book;
import com.sun.syndication.feed.rss.Channel;
import com.sun.syndication.feed.rss.Item;

public class BookRssView  extends AbstractRssFeedView
{
	@Override
	protected void buildFeedMetadata(Map model, Channel feed,
			HttpServletRequest request) {
		
		feed.setTitle("Book Data");
		feed.setDescription("This is an awesome feed about my book.");
		feed.setLink("blog.inflinx.com");
		
	}
	
	@Override
	protected List buildFeedItems(Map model, HttpServletRequest request, 
				HttpServletResponse response) throws Exception {
		
		// Get the book from the model
		Book book = (Book)model.get("book");
		
		// Create feed items
		List items = new ArrayList();
		Item item = new Item();
		item.setAuthor(book.getAuthor());
		item.setTitle(book.getName());
		item.setLink("http://inflinx.com/ldap");
		items.add(item);
		
		return items;
	}

}


The BookRssView extends Spring’s AbstractRssFeedView. In the buildFeedMetadata we create RSS metadata such as title, link and description. In the buildFeedItems we create the items that needs to be part of the RSS feed.

Now, when we hit the controller with a json extension we will get the JSON output as shown below:

JSON View

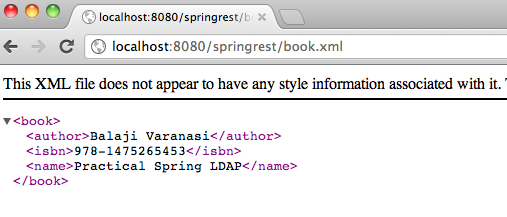
Similarly, the XML view is shown below:
XML View

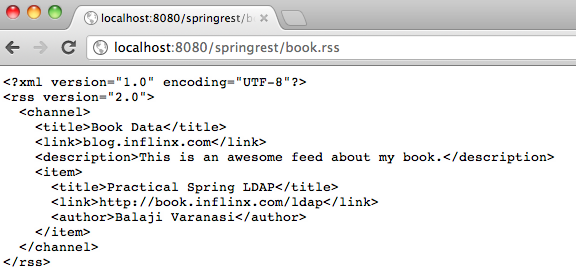
Finally, the RSS view is below:
RSS View

Categories: Rest Tags: , , ,

Obtaining/Redeeming App Store Promo Codes

April 26th, 2012 No comments

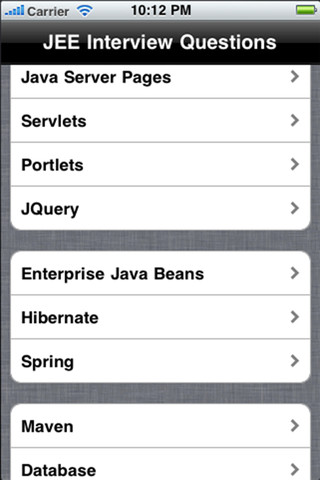
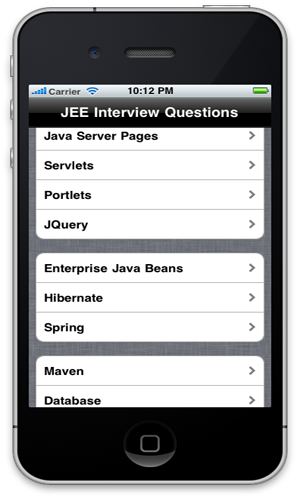
My new iPhone app JEE Interview Questions went on sale today.

JEE Interview Questions App

I needed to get some promo codes and thought it would be a good idea to log the process of obtaining and redeeming promo codes. Before we get any further it is important to remember that Apple only gives out fifty codes for each application. These codes are strictly for non-commercial use only and will expire in 28 days.

Obtaining Promo Codes

In order to obtain the promo code for your app, start by logging into iTunes Connect. Then hit Manage Your Applications.
Manage Apps

On the Application Details page, click the “View Details” button for the version you are interested in.
App Details

The ensuing Page click the “Promo Codes” button.
Promo Codes Link

Then, enter the number of codes you would like and hit Continue. You will be asked to accept Apple’s contract.


The next page will contain a Download button that will allow you to download the promo codes in a text file.
Download Promo Codes

Redeeming Promo Codes

To redeem a promo code, you need to launch the iTunes application on your Mac or Windows. On the top right corner of the iTunes Store, click the “Redeem” link.
Redeem Code

On the next screen, enter the promo code. You might be asked to login. Then, you will see a success screen and your app will get automatically downloaded.
Redeem Success

One way to get the app is to launch the App Store app on your iPhone. Go to Updates -> Purchased -> “Not On This iPhone” and you will see your app waiting to be installed.
JEE Interview Questions - Not Purchased

Categories: iPhone, Solutions Log Tags: , ,

Custom JSR 303 Constraints

April 24th, 2012 No comments

In my previous blog post I talked about validating Spring Web applications using JSR 303 annotations. In that post, we used the out of the box JSR 303 constraints such as @NotEmpty and @Size. These out of the box constraints should be sufficient for most cases. However, there will be situations where you want to develop custom constraints. In this post, we will look at creating a custom constraint
that validates the ISBN number of a book in our Online Bookstore Admin application.

Each JSR 303 validation constraint consists of two parts. The first part is the constraint annotation itself.

package com.inflinx.blog.bookstore.constraint;

import java.lang.annotation.Documented;
import java.lang.annotation.ElementType;
import java.lang.annotation.Retention;
import java.lang.annotation.RetentionPolicy;
import java.lang.annotation.Target;

import javax.validation.Constraint;
import javax.validation.Payload;

@Target({ElementType.FIELD})
@Retention(RetentionPolicy.RUNTIME)
@Documented
@Constraint(validatedBy=IsbnValidator.class)
public @interface Isbn 
{
	String message() default "{Isbn.message}";

	Class[] groups() default {};

	Class[] payload() default {};
}

The JSR 303 specification requires each constraint annotation to define the following three attributes:

  • message – The error message that gets returned upon validation failure. Here we have defined the default value Isbn.message that acts as a resource bundle key. It is possible to just hard code a message by simply omitting the braces.
  • groups – This defines the constraint groups that this annotation needs to be associated with. Here we will use the default group.
  • Payload – This holds the additional metadata information that can be supplied by validation clients. Here we are using the default empty array.

The @Target, @Retention and @Documented annotations are needed for the annotation declaration. The @Constraint annotation declares the validator that we will be using to validate elements annotated with @Isbn constraint.

The next step in creating the custom constraint is defining the validator.

package com.inflinx.blog.bookstore.constraint;

import javax.validation.ConstraintValidator;
import javax.validation.ConstraintValidatorContext;

import org.apache.commons.validator.routines.ISBNValidator;

public class IsbnValidator implements ConstraintValidator
{
	@Override
	public void initialize(Isbn isbn) { }

	@Override
	public boolean isValid(String value, ConstraintValidatorContext validatorContext) 
	{
		if(value == null || "".equals(value))
		{
			return true;
		}
		else
		{
			return ISBNValidator.getInstance().isValid(value);
		}
	}

}

Every constraint validator needs to implement the ConstraintValidator interface. The actual implementation of the IsbnValidator is straightforward. According to the specification, if the annotated element’s value is null or empty the validation should succeed. If you don’t want a null value, the element should be annotated with @NotNull annotation. The actual validation of the ISBN value is delegated to the Apache Validation API.

Now that we have the constraint defined, the next step is to use it in our Book Store application. To do that, we start out by creating a new property in the Book domain class and annotated it with @Isbn annotation. Here is the modified book class:

package com.inflinx.blog.bookstore.domain;

import javax.validation.constraints.Size;

import org.hibernate.validator.constraints.NotEmpty;

import com.inflinx.blog.bookstore.constraint.Isbn;

public class Book
{
	@NotEmpty
	private String name;
	
	@Size(min=1, max=50)
	private String description;
	
	@NotEmpty
	@Isbn
	private String isbn;
	
	public String getIsbn() {
		return isbn;
	}
	public void setIsbn(String isbn) {
		this.isbn = isbn;
	}
	public String getName()
	{
		return name;
	}
	public void setName(String name)
	{
		this.name = name;
	}
	public String getDescription()
	{
		return description;
	}
	public void setDescription(String description)
	{
		this.description = description;
	}
	
	@Override
	public String toString()
	{
		return "Name: " + name + ", Description: " + description + ", ISBN: " + isbn;
	}
}

Then we need to modify the form.jsp file to add the ISBN form field.

 		<form:form method="post" action="book.html" commandName="book">
					<table>
						<tr>
							<td>Name:</td> <td><form:input path="name" /></td> <td><form:errors path="name" /></td>
						</tr>
						<tr>
							<td>Description:</td> <td><form:textarea path="description"/></td> <td><form:errors path="description" /></td>
						</tr>
						<tr>
							<td>ISBN:</td> <td><form:input path="isbn" /></td> <td><form:errors path="isbn" /></td>
						</tr>
						</table>
					<input type="submit" value="Create" />
		</form:form>

The final step in this process is to add a new validation key/value to the messages.properties file. Here is the new messages.properties file:

NotEmpty.book.name=Name is a required field
Size.book.description=Description must be between 1 and 50 characters
Isbn.book.isbn=Please enter a valid ISBN

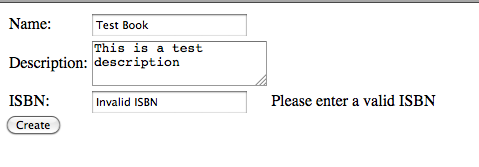
Now, when you submit the form with an invalid ISBN value, you will see a validation error.

Getting Started With Git and GitHub

April 22nd, 2012 No comments

For the last two years, I have been using Git on a windows machine. Recently, I had to install Git on my Mac and connect to Github. Since I have not blogged for such a long time, I thought of jotting down my notes here.

Setting Up Git Locally

1. The first step in this process is to download and install Git locally. The easiest way to do is to download the Git OS X installer from http://code.google.com/p/git-osx-installer/downloads/list The recent version at the time of writing is 1.7.9.4.

Once the download is complete, just run the installer. Upon successful installation, run the following command:

2. The next step is to configure Git. To do this, run the following commands from the command line:

git config –global user.name “YOUR_NAME”
git config –global user.email “YOUR_EMAIL”

3. Now we are ready to create a Git repository. To do that, create a new directory where you want to store your project files. For this blog, I have created a new folder called “hellogit” and moved to the folder in the terminal.

To create a new repository, simply run the following command in the project folder:

4. Now we are ready to add files to our repository. Assume that we have two files in our project test.html and test2.html. Move the files into the hellogit project folder.

Now run the git status command to know the latest status of our repository:

Git comes back saying that we have two untracked files. Git does not automatically track the files in our repository. Instead we need to explicitly add them.

5. To add files to Git, simply run the following command:

If you are new to Git, you might be wondering about the lack of feedback from Git about the add command. Just remember that upon a successful command execution, Git typically does not give you any feedback.

Let’s run the status command to see what happened:

From the above image, you can see that Git added our two files. It also mentions that we have a OS specific file DS_Store that needs to be tracked. We will address that in a minute.

6. When we are done making changes to our project files, we can check them in. To do that, simply run the following command:

In the above command, I have given a commit message “Initial Commit”.

7. Often we will end up with project and OS specific files (DS_Store) in our project folder that we don’t want to check in to Git. We can tell Git to ignore certain files and never track them. To do that, we simply create a .gitignore file that has the name(s) of the file that needs to be ignored.

Now, when the .gitignore file is in place, run the status command and you will see that the .DS_Store file is no longer tracked.

Preparing For Github

Before you can start using Github remote repository, you need to setup SSH keys. These keys are needed to establish secure connection between your computer and Github. To do that follow these steps:
1. Run the following command:

The No such file or directory indicates that you don’t have any SSH keys. Sometimes, the folder might exist but it might not have the id_rsa* SSH key files.

2. The next step is to create a new SSH key. Run the following command:

Hit enter to accept the default location. You will be asked to enter a passphrase. Enter a pass phrase and make a note of it as we will need it again.

Connecting To Github

1. Before we can push our code to a github repository, we need to create an account. Go to http://github.com and create a new account.

2. Once you have created and logged into your account, you need to give github your SSH key. In order to do that, go to your account settings page and click the SSH Keys Navigation Item:

3. Copy the SSH key you created above. To do that, simply go to the .ssh folder and type the following command:

4. Click the Add SSH Key button and enter the key as well as a title.

5. Go back to the terminal and try to connect to github using this command:

When you accept Yes, you will be asked to enter the passphrase:

Check the “Remember Password in keychain” and hit Ok.

6. Now, we are ready to start pushing code to Github. Before we do that we need to create a remote repository on Github. To do that, click the New Repository button:

Enter the following information for the new repository:

Make sure you leave all the fields in their default state.

7. Once the repository has been created on Github, move to your terminal and cd.. into the hellogit project. Then run the following two commands (replace bava with your username):

Now, go back to your Github repository https://github.com/YOUR_USER_NAME/hellogit and you will see that the files have been pushed.

Categories: Git, Solutions Log Tags: ,