Redirecting from WordPress.com

October 14th, 2009 1 comment

The blog post WordPress.com to WordPress.org is an excellent reference if you are planning on redirecting your existing WordPress.com blog to a blog on a domain you own. However, it does not talk about redirecting a WordPress.com blog to a blog on a sub-domain. In this post, I want to share the steps I followed to redirect my http://onerandomthought.wordpress.com blog to http://blog.inflinx.com hosted on Go Daddy. I am assuming that you have already moved all your posts from your WordPress.com blog to your new blog and verified that Permalinks on both blogs match.


Step 1: Log into http://wordpress.com and go to the Domains in the Dashboard. Under “Add a Domain” enter your subdomain.domain.com and hit “Add domain to blog”:
 Add a Domain


WordPress would come back complaining that there is a possible problem with the domain, It recommends that we add a CNAME entry pointing to WordPress.com blog in registrar before proceeding:
Problem Adding Domain


Step 2: Log into your godaddy.com account and launch Domain Manager. Select the domain name in the list of domains:
Go Daddy Select Domain


On the resulting page, click on the “Total DNS Control”:
Total DNS Selection


Inside the “Total DNS Control”, before I could add a CNAME entry for “blog”, I had to delete the existing “blog” record under A (HOST). The delete option is listed under “Actions”. Make sure you save the IP address that blog is pointing to:
 Delete Sub Domain


The next step is to create a new CNAME entry. Click on the Add New CNAME Record and fill the resulting form. Then, hit Ok and it would create a new CNAME record:
Add CNAME Record


Step 3: Repeat Step 1 and now wordpress.com should allow you to register the domain:
Wordpress - Add a sub domain


Follow the next steps and purchase the credits to register the domain:
Purchase Domain Mapping


Once the purchase, is complete, All the traffic for blog.inflinx.com should now be redirected to onerandomthought.wordpress.com.
After Domain Mapping Purchase
You might need to clear the DNS Cache to verify the redirect. On Max OSX, this is done through the command: dscacheutil -flushcache


Step 4: Now that we have this going, we just need to reverse the redirection behavior. In the WordPress.com, select the radio button next to your sub domain and hit “Update Primary Domain”. Then, go back to the “Total DNS Control” and undo what was done in Step 2. This involves first deleting the CNAME entry and adding the blog entry under A(Host). Make sure you are using the same IP address you saved in step 2.


Once Step 4 is completed, all the WordPress.com blog traffic should now be sent over to the blog on your sub domain.

Categories: Solutions Log, Wordpress Tags:

Adding JQuery Slider Part II

October 9th, 2009 No comments

In my last post I showed how to easily add slider functionality using JQuery. In this post I will showcase some of the options that slider provides with a Temperature Converter. This is how it will work: the slider represents temperature measured in Celsius units and ranges between 0 and 100. As the user drags the slider, we will display the temperature equivalent in Fahrenheit.

Lets start by registering a basic slider:

   <script type="text/javascript">
	$(function()
	{
		$("#slider").slider();
	});
   </script>

Since the slider converts temperatures in the range 0 celsius and 100 celsius, modify the slider definition to include the range:

	$("#slider").slider({
		min: 0,
		max: 100,
		step: 1
		
	});

The next step is to add two span tags to display the chosen temperature and the temperature in Fahrenheit:

	Temperature in Celsius: <span id="celsius">0</span>
	
Temperature in Fahrenheit: <span id="fahrenheit"></span>

Finally all we need to do would be to captrue the slide event so that we can update the span tags:

	$("#slider").slider({
		min: 0,
		max: 100,
		step: 1,
		slide: handleSlide
	});

The handleSlide is a javascript function that looks like this:

	function handleSlide(event, ui)
	{
		// Update the celsius span
		$("#celsius").html(ui.value);

		// Compute the fahrenheit equivalent
		var fTemp = (1.8 * ui.value) + 32;

		// Just display the last two digits of the temp
		$("#fahrenheit").html(fTemp.toFixed(2));
	}	

Here is a working demo

Categories: JQuery, Solutions Log Tags:

Theming Websites using Spring MVC

October 8th, 2009 8 comments

Many websites today allow their users to theme or change the look and feel of their sites. Gmail for example, currently provides over 34 themes to skin the mail interface. Themes can make websites more interactive and put the user in the driver seat when it comes to experiencing the site.

Conceptually, a theme is a collection of static resources such as stylesheets and images. When a user picks a theme, the theme’s styles and images dynamically gets associated with the site. In this post, I will create a simple Spring MVC Web application and show how Spring MVC can be used to manage theme resources easily. If you have used Spring MVC quite a bit, you can safely skip to Step 5.

Step 1: The first step in the process is to create a Spring MVC web project. Following maven conventions, here is the directory structure of the project:

Spring MVC Theme Project Structure

Spring MVC Theme Project Structure

Step 2: The next step is to add the required jars. Here is the dependency list that needs to be added to the pom.xml file:

		
		<dependencies>
			<dependency>
			    <groupId>org.springframework</groupId>
			    <artifactId>spring-webmvc</artifactId>
			    <version>2.5.6.SEC01</version>
			    <scope>compile</scope>
        		</dependency>	
        
			<dependency>
				<groupId>log4j</groupId>
				<artifactId>log4j</artifactId>
				<version>1.2.14</version>
				<scope>compile</scope>
			</dependency>
		</dependencies>			
	

This would add the following jars to the project:

Spring MVC Theme Jars

Spring MVC Theme Jars

Step 3: The next step is to add Spring “goodness” to the project. This is done by adding Spring MVC dispatcher servlet definition to web.xml:

		<!-- Spring MVC Servlet -->
		<servlet>
			<servlet-name>springthemes</servlet-name>
			<servlet-class>org.springframework.web.servlet.DispatcherServlet</servlet-class>
			<load-on-startup>1</load-on-startup>		
		</servlet>
			
		<servlet-mapping>
			<servlet-name>springthemes</servlet-name>
			<url-pattern>*.html</url-pattern>
		</servlet-mapping>	
	

The Spring MVC Dispatcher Servlet by default looks for the <context-name>-servlet.xml file for Web Tier bean definitions. Create a file called springthemes-servlet.xml under WEB-INF folder with the following information:

<?xml version="1.0" encoding="UTF-8"?>
<beans xmlns="http://www.springframework.org/schema/beans" xmlns:xsi="http://www.w3.org/2001/XMLSchema-instance"
		xmlns:p="http://www.springframework.org/schema/p" xmlns:context="http://www.springframework.org/schema/context"
		xsi:schemaLocation="http://www.springframework.org/schema/beans http://www.springframework.org/schema/beans/spring-beans-2.5.xsd
				http://www.springframework.org/schema/context http://www.springframework.org/schema/context/spring-context-2.5.xsd">
	
	<!-- Scan for controllers -->
	<context:component-scan base-package="com.inflinx.blog.springthemes.web.controller" />
	
	<!-- Views are jsp pages defined directly in the root -->
	<bean class="org.springframework.web.servlet.view.InternalResourceViewResolver" p:suffix=".jsp"/>
    
</beans>

Step 4: To keep things simple, create a controller class called HomeController that simply redirects to the home.jsp page. Here is the HomeController class definition:

	package com.inflinx.blog.springthemes.web.controller;

	import org.springframework.stereotype.Controller;
	import org.springframework.web.bind.annotation.RequestMapping;
	import org.springframework.web.bind.annotation.RequestMethod;

	@Controller
	@RequestMapping("/home.html")
	public class HomeController
	{
		@RequestMapping(method = RequestMethod.GET)
		public String showHome()
		{
			return "home";
		}
	}

Here is the home.jsp file:

<html>
	<head>
		<title>Welcome to Spring Themes</title>	
	</head>
	
	<body>
		Hello Visitor!!
	</body>
</html>

If you deploy the application and hit http://<server:port>/springthemes/home.html, you should see a page that looks like this:

Spring MVC Theme Default Page

Spring MVC Theme Default Page

Now that we are successfull in creating a simple Spring MVC project, lets add two themes to it – dark theme and bright theme. The site automatically gets the “dark” theme during nights and the “bright” theme during day time.

Step 5: In this step, lets create the css files (one of the many static resources that a theme can have) associated with each theme. Here are the css files (I placed them under the themes folder):

dark.css

	body {
		font-size:13px; 
		text-align:center;
		color: white;
		background-color: black
	}

bright.css

	body {
		font-size:9px; 
		text-align:center;
		color: blue;
		background-color: white;
}

Step 6: The next step is to define the themes. The default way to do this in Spring MVC is to use one property file for each theme. Here are the two theme definitions:

#dark theme properties file dark.properties
css=themes/dark.css
page.title=Welcome to Dark Theme
welcome.message=Hello Visitor!! Have a Good night!!

#bright theme properties file bright.properties
css=themes/bright.css
page.title=Welcome to Bright Theme
welcome.message=Hello Visitor!! Have a Good day!!

Step 7: Now that we have defined the themes, we need to tell Spring where to find them. This is done using a ThemeSource. Add the following line to the springthemes-servlet.xml file:


Step 8: Spring needs to know what theme to use when a request is made. This is done using a ThemeResolver. Spring provides three theme resolvers out of the box: FixedThemeResolver, SessionThemeResolver, CookieThemeResolver that are sufficient for most use cases. However, our site needs to inherit a theme based on the time, we will create a new theme resolver called DarkAndBrightThemeResolver:

package com.inflinx.blog.springthemes.web.resolver;

import java.util.Random;
import javax.servlet.http.HttpServletRequest;
import javax.servlet.http.HttpServletResponse;
import org.springframework.web.servlet.theme.AbstractThemeResolver;

public class DarkAndBrightThemeResolver extends AbstractThemeResolver
{
	@Override
	public String resolveThemeName(HttpServletRequest arg0)
	{	
		return isNight() ? "dark" : "bright";
	}

	// Pretty lame implementation
	private boolean isNight()
	{
		return new Random().nextBoolean();
	}
	
	@Override
	public void setThemeName(HttpServletRequest arg0, HttpServletResponse arg1, String arg2)
	{	
	}
}		

Add the newly created theme resolver definition to the springthemes-servlet.xml file:


Step 9: The final step is use modify the view to use the theme. This is done using tag. Make the following changes to home.jsp page:

  <%@ taglib prefix="spring" uri="http://www.springframework.org/tags"%>
  <html> 
  	<head>
  		<link  rel="stylesheet" href='<spring:theme code="css"/>' type="text/css" />
  		<title><spring:theme code="page.title"/></title>	
  	</head>
  	<body>
  		<spring:theme code="welcome.message" />
  	</body>
  </html>

Now, redeploy the application and as you refresh the URL, you should randomly see the site switch between the two themes. Here is the site with the two themes:

Dark Theme
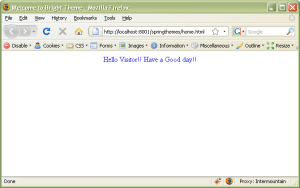
Dark Theme


Bright Theme

Bright Theme

Categories: Spring Tags: ,

Adding JQuery UI Slider

October 1st, 2009 No comments

Here are five easy steps to add slider functionality to your web applications:

Step 1: Go to JQuery UI site and create a custom download. To keep things simple, select “No Theme”.under theme section and deselect all but UI Core and Slider checkboxes. Hit Download and unzip the downloaded file.

Step 2: Copy the jquery-1.3.2.min.js and “jquery-ui-1.7.2.custom.min.js” files into your project. These files should be under the js folder. Include the js files in your html/jsp page.


Step 3: Add the following styles to the page:


I am using the slider bar and slider handle images from YUI

Step 4: Add a DIV for the slider in the HTML.


Step 5: Initialize the slider in the document ready function:


That’s it. You can find a demo of this example here.

Basic JQuery Tips

September 22nd, 2009 No comments

This is more for my reference and hopefully helps others working with JQuery.

  1. Getting and Setting the innerHTML of an element

    	
    		var content = $("#id").html();
    		$("#id").html("Some HTML");		
       
  2. Getting and Setting the text (with out any HTML) of an element

    		
    		var txt = $("#id").text();			
    		$("#id").text("Some Text");		
    	
  3. Removing content from an element

    		
    		$("#id").empty();		
    	
  4. Getting and Setting style properties

    			
    		var displayValue = $("#id").css("display");
    		
    		$("#id").css("display", "block");
    	
  5. Hiding and Displaying elements

    	
    		// Toggles an element's visibility
    		$("#id").toggle();
    				
    		$("#id").hide();
    		
    		// Sets the display style property to block and not inline
    		$("#id").show();		
    	
  6. Registering to events such as keyup

    		$("#id").keyup(function(){
    			alert($(this).val());
    		});
    	
  7. Dealing with CSS classes

    		// Adds the specified class to the element
    		$("#id").addClass("showme");
    		
    		// Multiple classes should be separated by spaces
    		$("#id").addClass("showme1 showme2");
    				
    		// Removes the specified class
    		$("#id").removeClass("hideme");
    		
    		// Multiple classes should be separated by spaces
    		$("#id").removeClass("hideme1 hideme2");
    		
    		// Removes all the classes
    		$("#id").removeClass();
    	
  8. Getting and Setting values of form elements

    		// For input boxes
    		$("#inputbox").val(); // Returns the text box value
    		$("#inputbox").val("set some value");
    		
    		// For select boxes
    		$("#selectbox").val(); // Returns the selected value 
    		// To get the text of the selected option
    		$("#selectbox :selected").text();
    		
    		// Programatically selects a value or multiple values
    		$("#singleselect").val("123");
    		$("#multipleselect").val(["12", "234"]);
    
    		// For checkboxes and radio buttons
    		$("#chkId").val();  // Returns value whether the check box is checked or not
    		// Returns true when the check box is checked
    		$("#chkId").attr("checked"); 		
    		
    		// Programatically checks the check box
    		$("#chkId").attr("checked", "checked"); 	
    	
Categories: JQuery, Uncategorized Tags:

Getting started with Flex – Setting up Development Environment

September 4th, 2009 1 comment

The first step in developing an enterprise level flex application is setting up a development environment. Adobe offers an eclipse based development tool called Flex builder that provides a variety of features making Flex development a breeze. This flex builder comes in two flavors: a standalone IDE and an eclipse plugin. Since I will be developing Java based Flex applications, I decided to install the plugin version of the Flex builder in my favorite MyEclipse IDE.

We start with MyEclipse installation.

  1. Download the MyEclipse 7.5 “All in One” installer from MyEclipse site
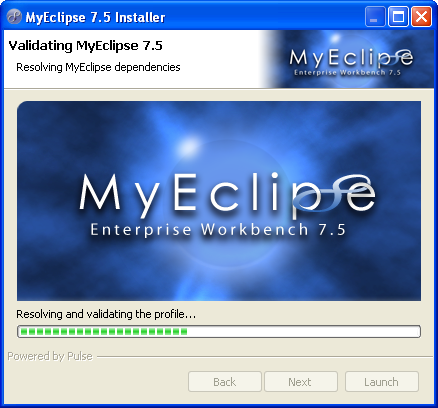
  2. Once the download is complete, click on the installer file to start the installation
    myeclipse-1
  3. MyEclipse would then prepare and validate the installation.
    myeclipse-3
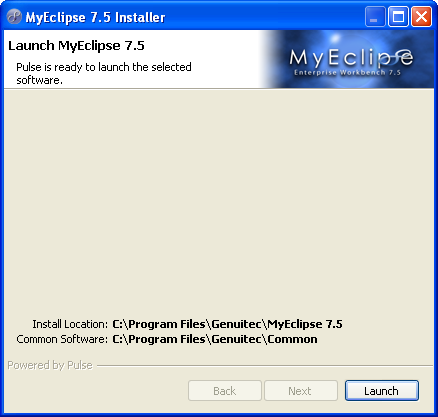
  4. Upon completion of step 3, you will be presented with the screen below:
    myeclipse-4
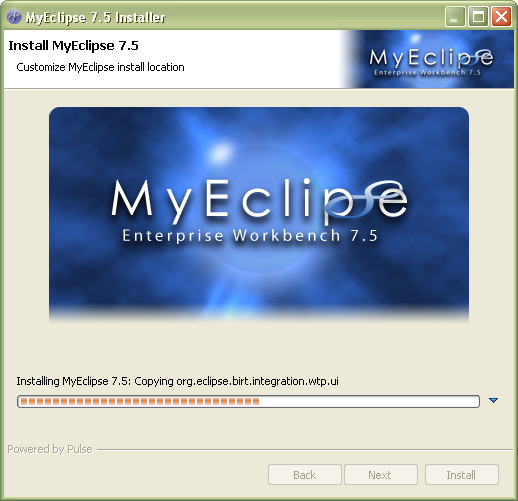
  5. Click on Launch to install the software.
    myeclipse-31
  6. After installation is complete, MyEclipse will launch itself. Select the default workspace and hit ok.

Now we are ready to install the Flex Builder Plugin.

  1. Download the Flex Builder 3 Plugin from Adobe site.
  2. Upon completion of the download, double click the installer file to launch the installation.
    1
    2
  3. On the next screen, select the language and hit Ok.
    3
  4. Accept the license agreement and hit Next.
    5
  5. On the next screen you can customize the Flex Builder Plugin location. Just accept the default location and hit Next.
    6
  6. The next screen asks for an Eclipse installation folder. DO NOT SPECIFY AN EXISTING ECLIPSE INSTALLATION LOCATION. Create a new folder called “eclipse” in your file system (in my case I created it under C drive) and provide that location to the installer. Hit Next.
    7
  7. On the next screen click “Proceed with Caution”.
    8
  8. Hit Next and then Install to start the installation.
    9
    10
  9. Wait for the installation to complete.
    11
  10. Upon completion, you should see the following screen.
    12

Integrating MyEclipse 7.5 and Flex Builder Plugin

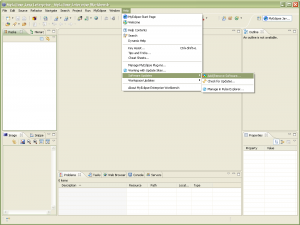
  1. Go to Add/Remove Software in MyEclipse 7.5.
    13
  2. Select Personal Software and click Add.
    21
  3. On the next screen, click Add Local.
    31
  4. Select “com.adobe.flexbuilder.update.site” folder in your Flex Builder Plugin install folder and click ok.
    4
  5. Select “Flex Builder 3” and hit Next.
    51
  6. On the following screen hit Apply.
    61
  7. MyEclipse would perform a validation of the install.
    71
  8. Accept the License agreement and hit Next.
    81
  9. Click Update to trigger software update.
    91
    101
  10. Once the update is complete, click Yes to restart MyEclipse.
    111

Changing Flex SDK installation location

  1. Go to “Installed Flex SDKs” in MyEclipse under Window->Preferences->Flex. You should see two SDKs installed with errors next to them.
    121
  2. Select Flex 0.0 and hit Edit. Click Browse in the popup and browse for 2.0.1 SDK located under /sdks/2.0.1. Hit Ok.
    131
  3. Repeat step 2 for Flex 0.0(1) and select the 3.2.0 SDK folder.
  4. This completes the plugin installation. Restart MyEclipse Workbench.

Testing installation

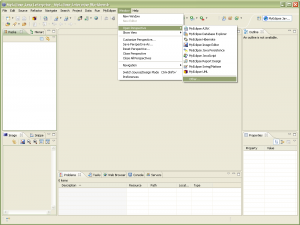
  1. Open the Flex Builder perspective by clicking Window->Open Perspective->Other and then selecting Flex Development.
    14
  2. Create a new Flex Project by going to File->New->Flex Project. Enter the following project details and hit Finish.
    16
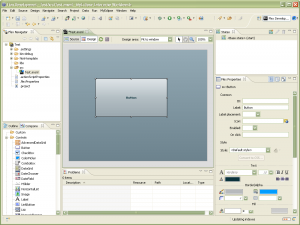
  3. Open the Test.mxml file and go to “Design” view. Drag a button on to the canvas and save the file.
    17
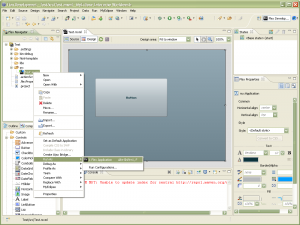
  4. Launch the application by right clicking on Test.mxml->Run As->Flex Application.
    18
  5. You should see the application run in your default browser.

Upgrading Flex SDK:

  1. Get the latest version of Flex SDK (3.4.0 at the time of writing this post) from Adobe’s site
  2. Unzip the downloaded file into /sdks/3.4.0 folder.
  3. In MyEclipse go to Installed Flex SDKs and click Add. Browse for the 3.4.0 folder and enter 3.4.0 as the name and hit Ok.
    20
  4. Make sure that 3.4.0 SDK is selected and hit Ok.

References:
http://riawanderer.com/?p=4

Categories: Flex Tags:

Reading Operational Attributes using Spring LDAP

September 1st, 2009 2 comments

Ldap Servers maintain operational attributes (introduced in version 3) for administrative purposes. For example, the Tivoli Directory Server maintains the pwdAccountLockedTime operational attribute to record the time a user’s account got locked.

These operational attributes are unique in the sense that they are not part of an object class and are not returned unless they are explicitly requested by name. Here are two ways of reading operational attributes using Spring Ldap:

Using lookup:

LdapTemplate ldapTemplate = new LdapTemplate(context);
ldapTemplate.lookup("USER_DN", new String[]{"OPERATIONAL_ATTR"}, new ContextMapper(){
		@Override
		public Object mapFromContext(Object ctx)
		{
			DirContextAdapter context = (DirContextAdapter)ctx;
			return context.getStringAttributes("OPERATIONAL_ATTR");
		} }); 

Using Search:

LdapTemplate ldapTemplate = new LdapTemplate(context);
ldapTemplate.search("SEARCH_BASE", "uid=UNIQUE_USER_NAME", 1, new String[]{"OPERATIONAL_ATTR"}, new ContextMapper(){
		@Override
		public Object mapFromContext(Object ctx)
		{
			DirContextAdapter context = (DirContextAdapter)ctx;
			return context.getStringAttributes("OPERATIONAL_ATTR");
		} });
Categories: Ldap, Spring Tags: