Distributed JMS Queue on WebLogic 10
Several months ago, I had to setup a JMS queue on a WebLogic 10 server. Bea has nice documentation for JMS at http://edocs.bea.com/wls/docs100/messaging.html. Here is a condensed version for setting up JMS Distributed Queues.
Disclaimer: These are instructions for the minimal JMS setup and do not include optimizations/tuning for production environment.
The first step in setting up a Distributed Queue is to create a JMS server for managing the Queue. Here are the steps for creating a JMS server.
-
Under Domain Structure, go to Services -> Messaging -> JMS Servers and hit New
-
Enter a name for the JMS server (e.g., “Blog JMS Server”)

-
Hit “Create a new Store” (if you are not planning to persist messages, you don’t need a store).

-
Select “File Store” as the type, and in the subsequent screen, provide a name and directory location for the store. Hit Finish
-
Hit “Next” and select the target WebLogic server. Hit “Finish” to complete the JMS server creation. Make sure you “Activate” the changes.
The next step is to create a JMS Module. A JMS Module is a way for packaging JMS resources such as Queues and topics. Here are the steps to create a JMS module:
-
Under Messaging, select JMS Module and hit “New”.
-
Enter a name (e.g., Blog JMS System Module) and the rest of the fields on the page can be left empty.
-
Hit “Next”, and select the WebLogic server you would like to target (ideally, this would be the same server that is hosting the JMS server you created above).
-
On the next screen hit Finish and “Activate” changes.
Now that the entire infrastructure is in place, it’s time to create a Distributed Queue. WebLogic’s new “Distributed Queue” eliminates the need to create physical queues and mapping them to a Distributed Queue (a great improvement from WL 8.x). Here are the steps:
-
Select the JMS Module you just created and hit “New” on the next page.
-
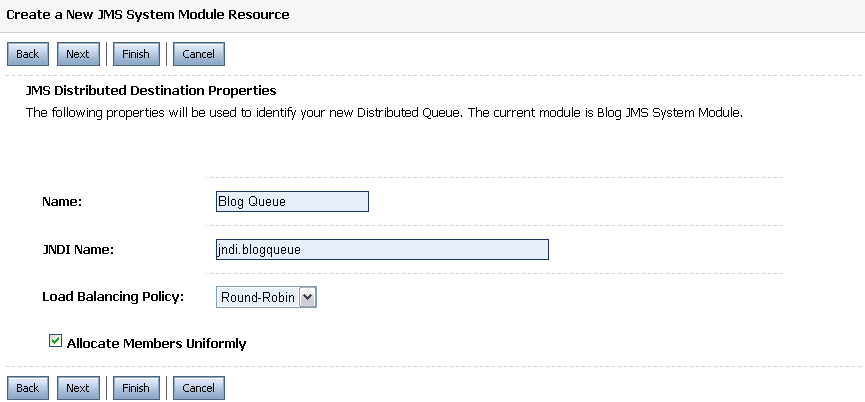
Select Distributed Queue option and continue on to the next page.
-
Provide a name (e.g., Blog JMS Queue) and a JNDI name (e.g., jndi.blogQueue).
-
On the next page, select “Advance Targeting” and hit “Create a New Subdeployment”. A Subdeployment is a convenient way for grouping and targeting JMS module resources.
-
Provide a name (e.g., Blog Subdeployment) for the Subdeployment and hit “Ok”.

-
Select the JMS server you created above as the target and hit “Finish”.
For clients to connect and use JMS resources, a JMS Connection Factory is needed. Here are the steps for creating a Connection factory:
-
Select the JMS Module created above and hit “New” on the next page.
-
Select “Connection Factory on the next screen and move on to the next page.
-
Give the Connection factory a name (e.g., Blog Connection Factory) and JNDI name (e.g., jndi.blogfactory). Hit “Next”.

-
Select “Advance Targeting” and on the next page, select the Subdeployment you created above (Blog Subdeployment). Wait for the page to refresh itself and hit Finish


I’m trying to look up the JMS queue that I created in Weblogic 10 using the same procedure that you used above.
However, I do not see the queue inside of the JNDI view. Are you supposed to be running the JMS queues in the Admin Server? Or can you run them in a managed server?
Ronak,
You should be able to deploy and use JMS queues on managed servers also (probabily a good idea).
Do you have a copy of the the Java source file to connect to send a message to this JMS?
This might be a good starting point http://onerandomthought.wordpress.com/2008/08/20/sending-a-message-to-jms-queue/
I followed the above steps and could create jms server and jms module successfully. Now when i try to send msg there is a problem with jndi.
Environment variable:
url provider is : t3://localhost:7001/
context : weblogic.jndi.WLInitialContextFactory
The real problem is here..
connectionFactory = (ConnectionFactory) jndiContext
.lookup(“jndi.myconnectionfactory”);
am i using the correct jndi name for lookup. The jndi name for my connection factory is “jndi.myconnectionfactory” or is there any other path which i must include before the jndi name?
@Ronak Patel
I met the same problem as Ronak. I was using WLS 10g. So i wonder if what Balaji described above is a new feature of WLS 10gR3 (WLS 11g), not WLS 10g.
Balaji, what version did you use above?
I have used the above technique in WL 10.3 (and older 10.x version).
Hi experts,
I would like to know if it is possible to create many JMS queues in a weblogic server using the technique mentioned in this blog?
In addition, isit I must use weblogic 10.x ver and above to implements many JMS queues in a weblogic server.
THank you. 🙂
Brandon, you can create as many JMS queues as you want in a single WL instance.
@Balaji
Hi Balaji,
Thanks for the quick response.
1.In that case, that means I can have a single distributed queue containing many queues in a single JMS server without using clustering? yes / no?
2.In addition only weblogic 10 and above supports this functionality? yes / no?
3. May I know use what C++ api/interface to communicate with weblogic 10?
Any idea?
Thank you.
@Brandon,
1. A distributed queue is more or less an illusion of a single queue in a clustered environment. So, you cannot have a single distributed queue containing multiple queues.
2. I remember using distributed queues in weblogic version 8 also.
3. I don’t know if a C++ API is available for Weblogic 10 JMS communication